
Manage Storage Pool
Manage Storage Pool Properties
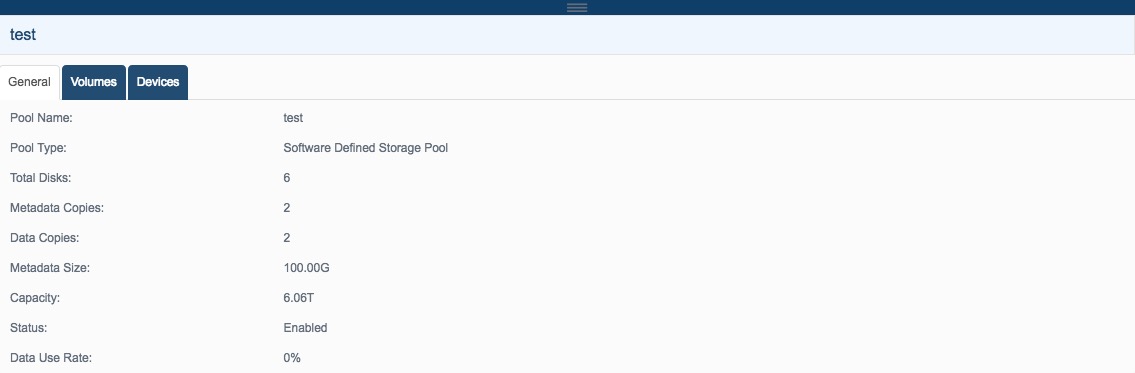
After select a Storage Pool, there tab panels show for the Storage Pool:
- 1. General, shows storage pool generic information like copies, used space etc.
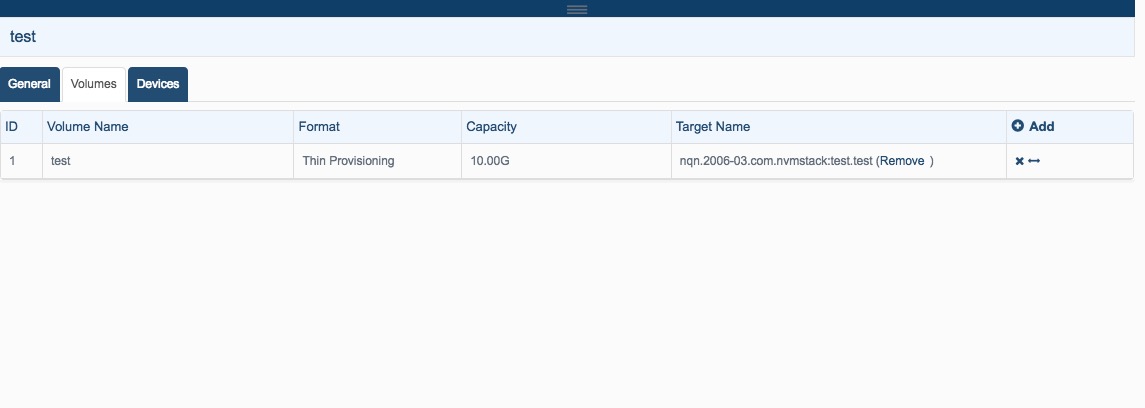
- 2. Volumes, shows storage pool logical volume, user can manage volume here. For RAID storage pool, there is only one volume.
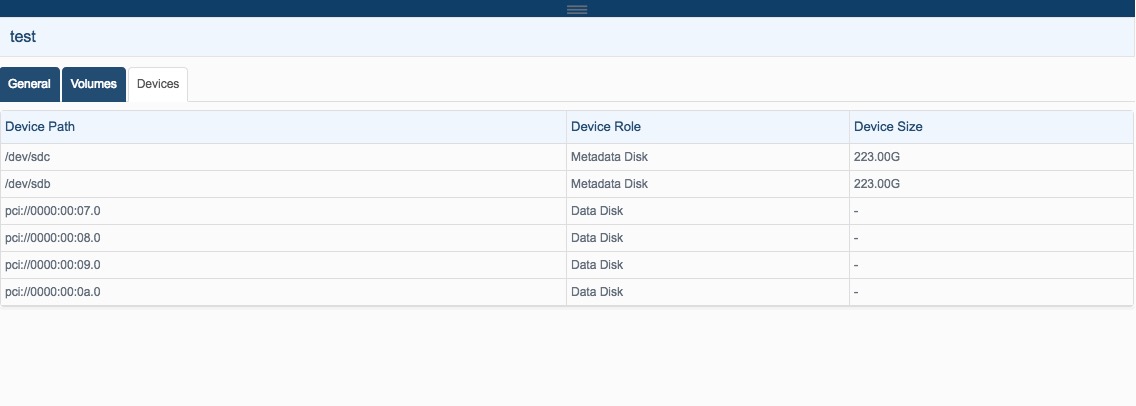
- 3. Devices, shows storage pool used devices.
Manage Storage Pool
Use can do the following management to a existing storage pool:
1. Rename Click the Edit link on the top toolbar, the Edit Storage Pool dialog shows.
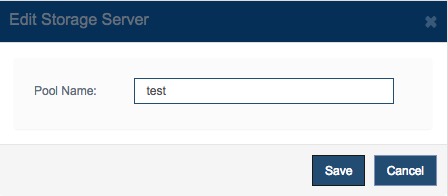
Type new storage pool name then press the Save button to rename it.
2. Add disk (expand storage)
Click the Manage link on the task panel, the Manage Storage Pool Wizard shows.
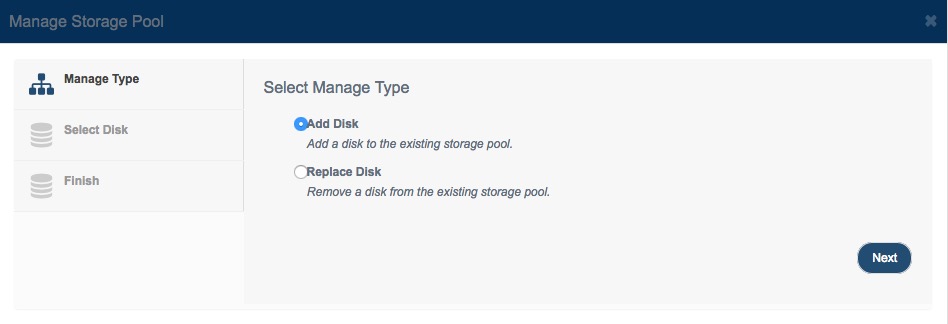
Choose Add Disk and press the Next button to continue.
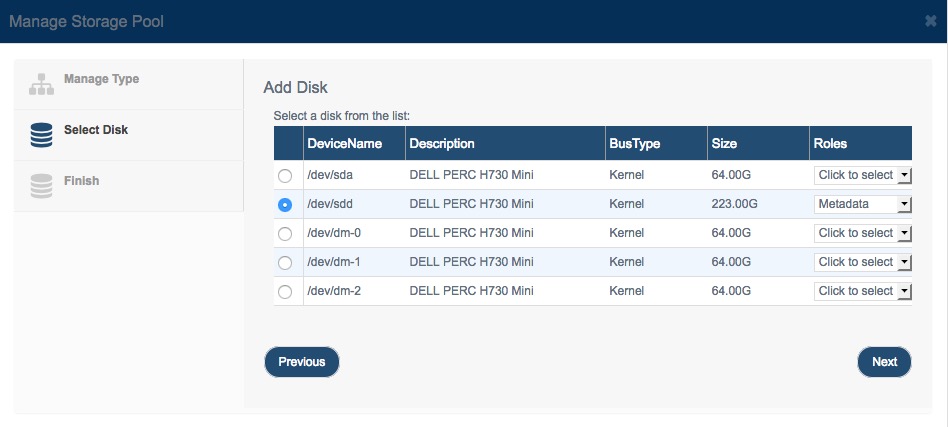
Just like creating storage pool add a disk and specify its role, then press the Finish button to add the disk.
Note: Please ensure there is no important data in the disk, while creating storage pool, all disks which being added to the storage pool will be erased.
3. Replace Disk
Click the Manage link on the task panel, the Manage Storage Pool Wizard shows.
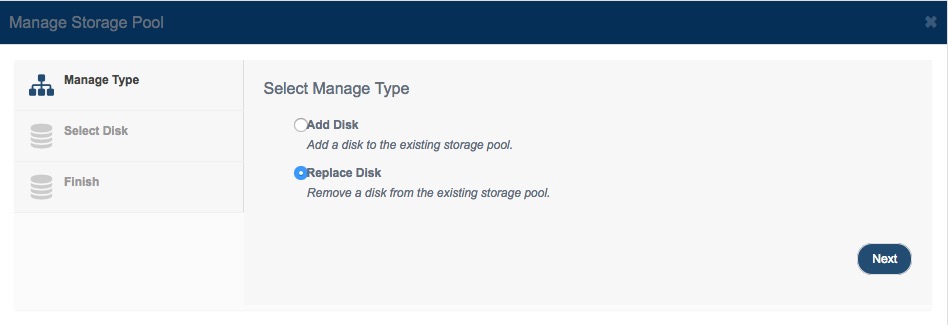
Choose Replace Disk and press the Next button to continue.
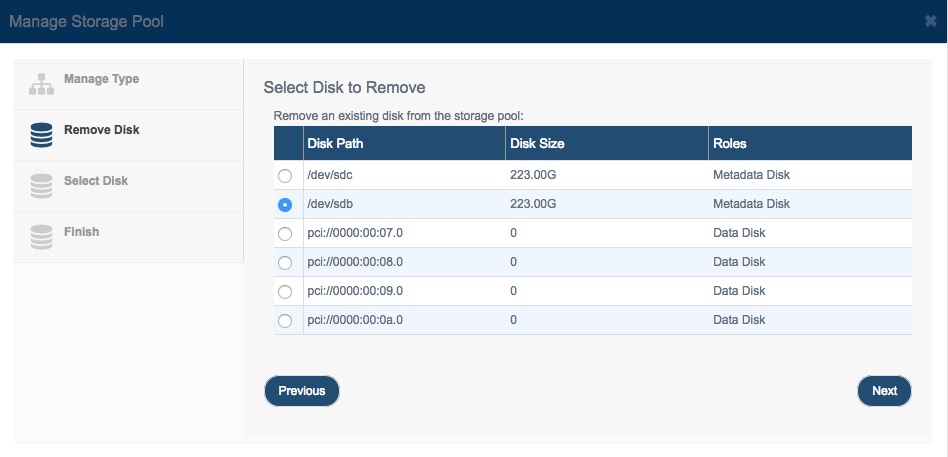
Select a disk to be replaced, the role for of the new disk was automatically specified
Press the Next button to continue.
Select a new disk to replace the previous selected one.
After review the detailed information, press the Finish button to replace the disk.
4. Enable and Disable
Click the Enable or Disable link on the task panel, to enable or disable the storage pool, only enabled storage pool can offer data service to other components.